Results 1 to 14 of 14

Thread: A few tricks for removing broken exhaust studs

  1. #1
    Administrator timsrv's Avatar
    My Van(s):
    Lots of them
    Join Date
    Jun 2010
    Location
    SW WA ST
    Posts
    6,261
    Rep Power
    10

    A few tricks for removing broken exhaust studs

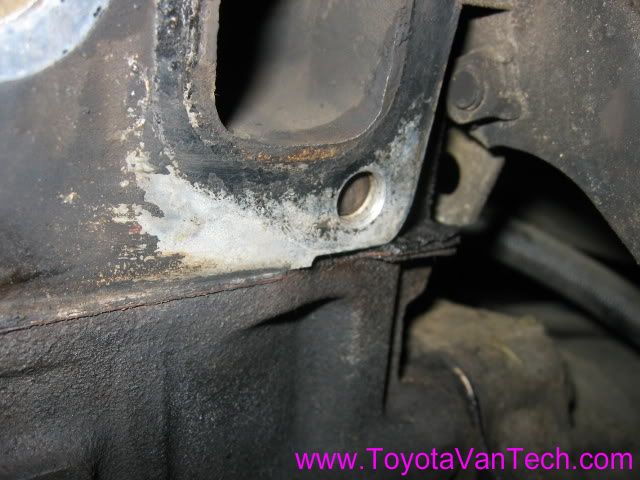
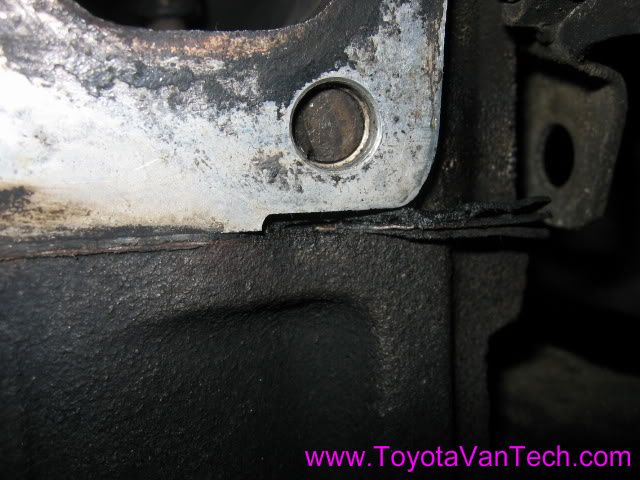
    Well, I finally decided to do something about that annoying exhaust leak, so I tore down the van and found I have a cracked manifold and a broken exhaust stud. I know some of you have asked about removing broken exhaust studs in the past, so I thought I'd do a write-up showing you how I do it. Due to years of experience as an aircraft toolmaker, I have developed a unique and unorthodox method for drilling out broken studs. Unfortunately there is some special and possibly hard to find equipment I use, but hopefully seeing the way I do it may give you ideas of your own. All the special bushings I used for this write-up were purchased at Boeing Surplus in Renton, WA and cost about a buck or 2.

    Okay, 1st step is to clean the area around the broken stud with a strong chemical like carb cleaner, brake clean, acetone, or any cleaning chemical similar in strength.


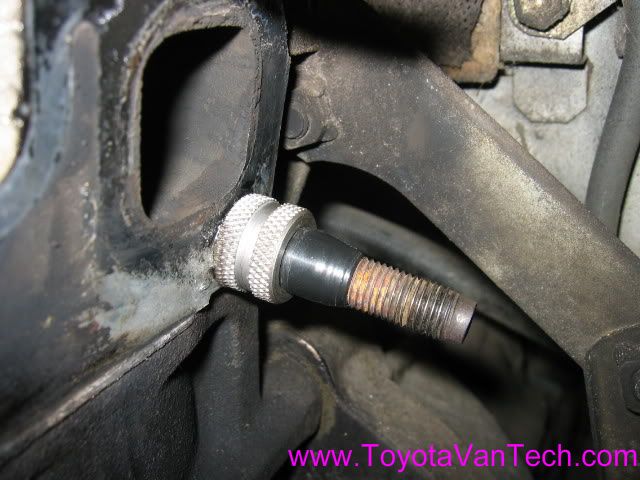
    I need to anchor something to the head to keep my drill bit steady and on-target. For this job I have chosen to use a 1/2" ID knurled tooling bushing. The next step is to find a way to positively index the bushing to the center of the hole. For this I have chosen to use an old exhaust manifold stud with tape wrapped around it.


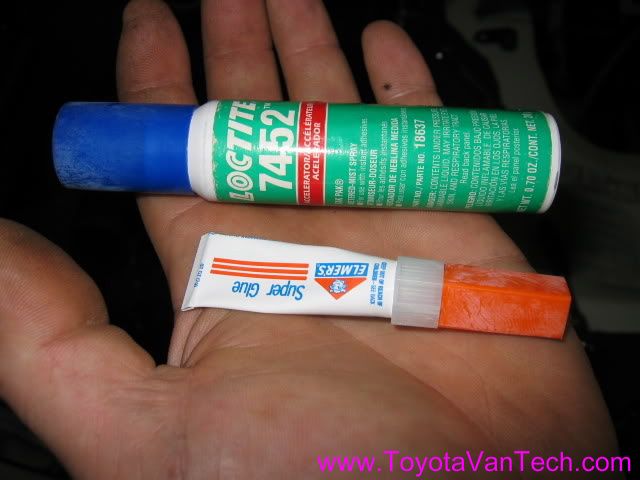
    Okay, so now I have the bushing and a way to center it, I need a way to temporarily secure it to the head. Super glue and Loctite #7452 Accelerator are great for this. With one hand I locate the bushing / stud to the desired position, and with the other hand I apply super glue between the head and the bushing. Now I grab the accelerator spray and spray it onto the exposed glue. Accelerator spray is awesome stuff. It chemically activates the superglue causing it to cure instantly.


    Within seconds I can let go of the bushing and it will stay put all by itself! (sorry there's not a picture of the gluing and accelerating, I was using both my hands at the time)


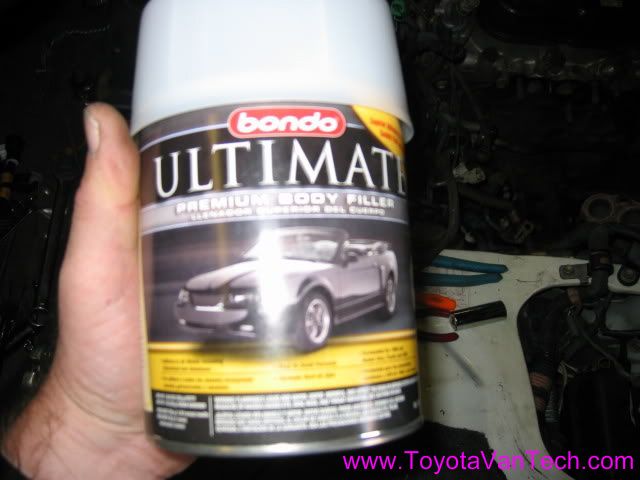
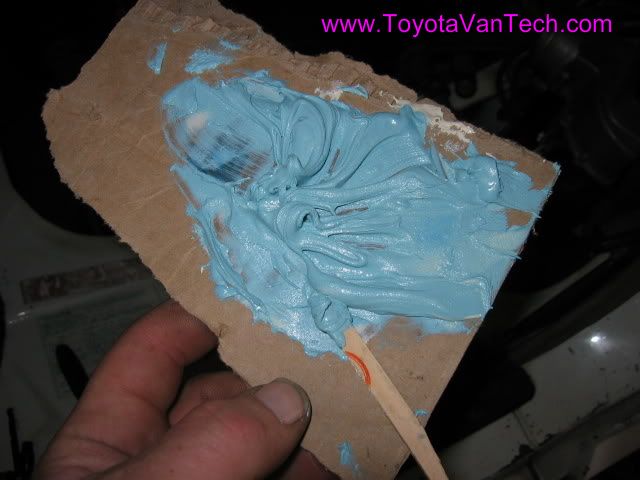
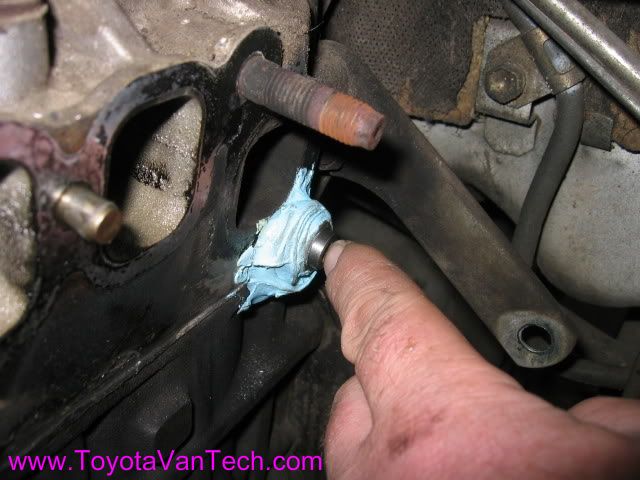
    Okay, so the glue may hold the bushing and the stud, but that's about all it will do. What I need now is something to beef it up. Bondo is just the ticket for this job.


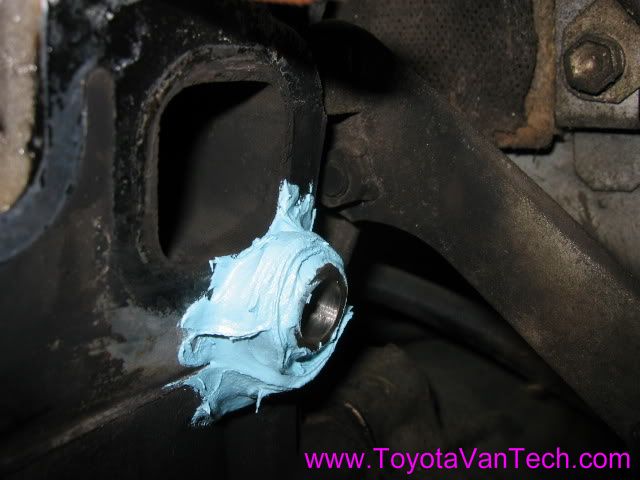
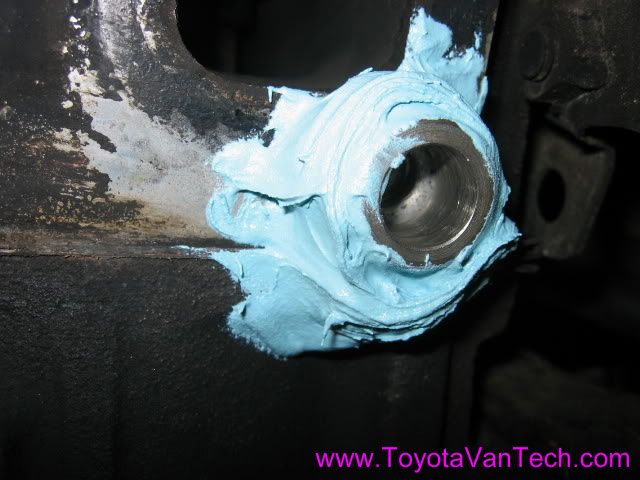
    Okay, here's a picture of the bushing secured with Bondo. The Bondo does a couple of things. It gives me something to grab onto and it mates perfectly with the irregular surface of the head. While drilling I can push against the bushing and it will guide my drill bit straight. Even if the bushing breaks off the head during drilling (and quite often they will), It still gives me a reference point and I can push the bushing flat with one hand while I run the drill with the other.


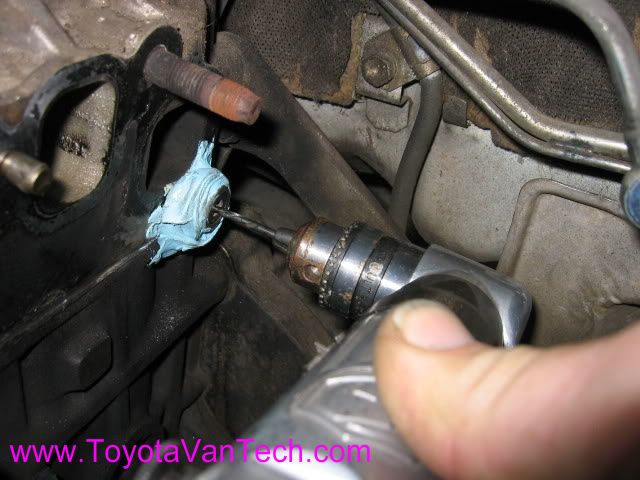
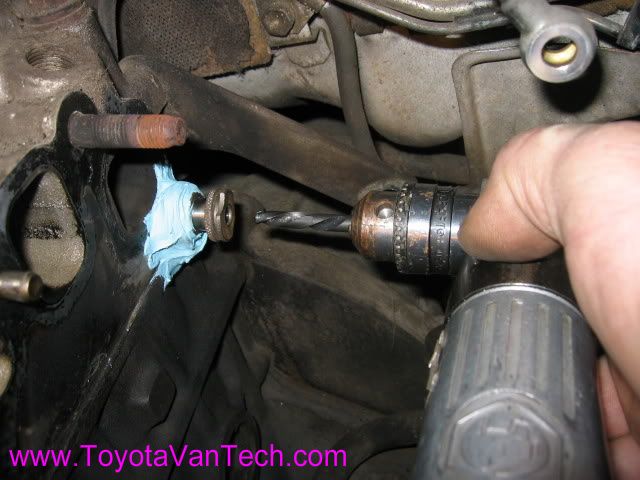
    Now that the bushing is secure, I need to drill a pilot hole in the broken stud. To keep the 1/8" drill bit centered, I am going to use a 1/8" drill bushing. I didn't have a bushing that went from 1/8" up to 1/2", so I simply pushed 2 bushings together to do the job.


    Just in case the stud is loose in the hole, I don't want the drilling action to drive it deeper. For this reason I am going to use a 1/8" reverse ground drill bit for drilling the pilot hole. Sometimes you get lucky and while drilling, the broken bolt or stud will pop right out. Wishful thinking? We will see.


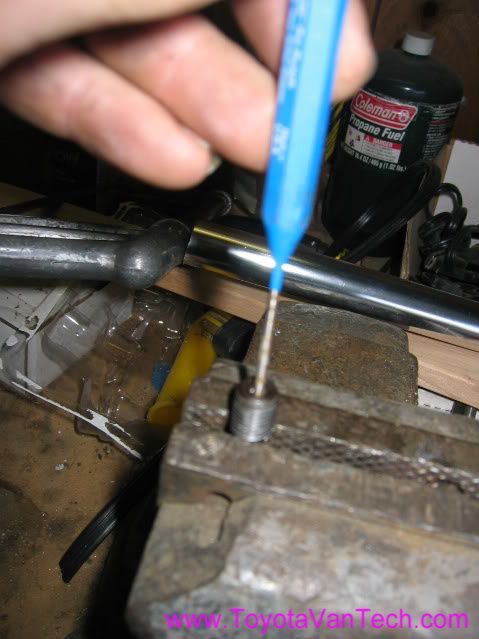
    Next I push the pilot bushing into the knurled bushing and start drilling. In this case, I am going to drill all the way through the broken stud. You will see why after a few more steps. Tip: Be sure to lubricate your drill bit with cutting oil, or you won't get too far.


    Okay, now for the big guns. I have here a reverse ground 1/4" drill bit and a drill bushing with a 1/2" OD and a 1/4" ID.


    Now to drill the 1/4" hole. My goal here is to drill the hole about 1/4" to 3/8" deep. This will be enough for my easy-out to grab onto the broken stud. No need to go any further.


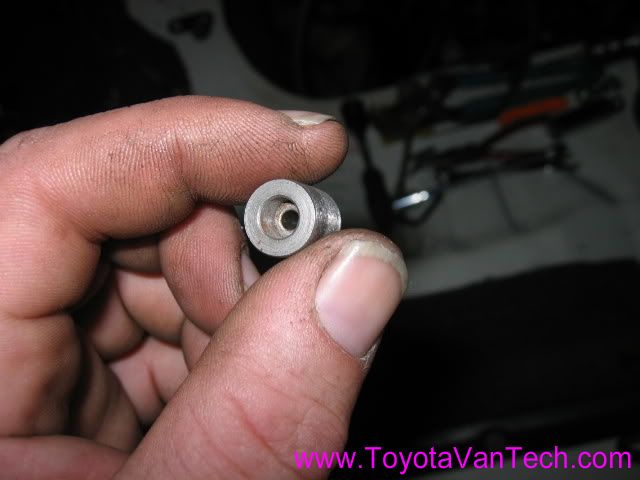
    So now the hole is drilled (about 3/8" deep) there is no longer any need for the drill bushing. To remove, I simply hit it with a hammer and break it off.


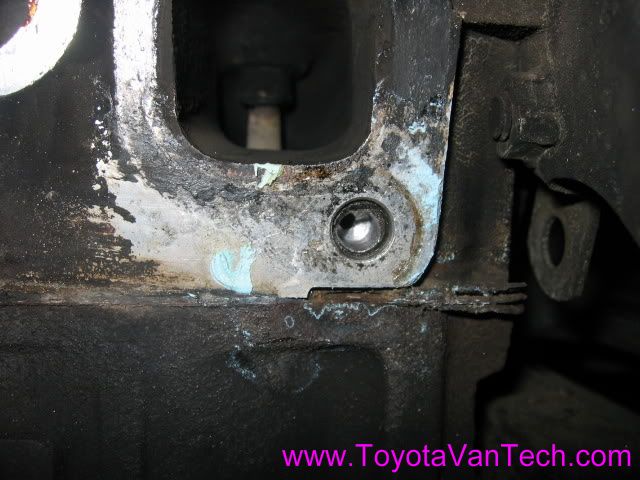
    Here's the finished hole.


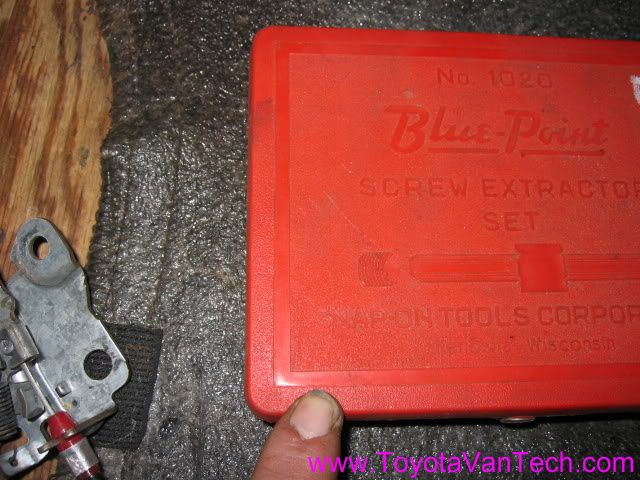
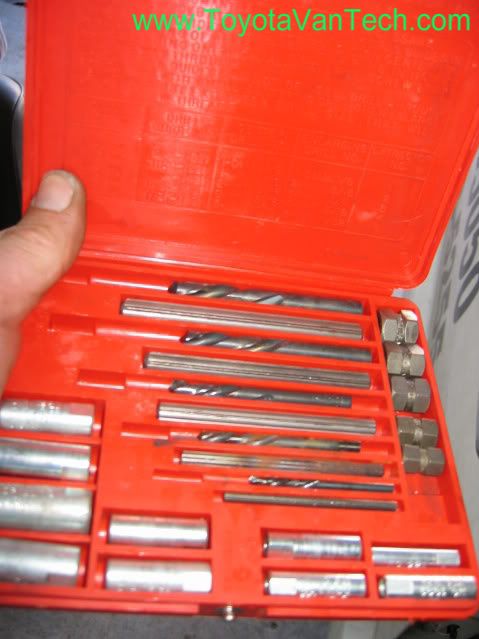
    It's time to break out the easy-out kit. IMO, Snap-on (or Blue Point) makes the best easy-outs. Those spiral ones are a joke. The Snap-on ones may cost a bit more, but in my opinion you can't afford not to have them.


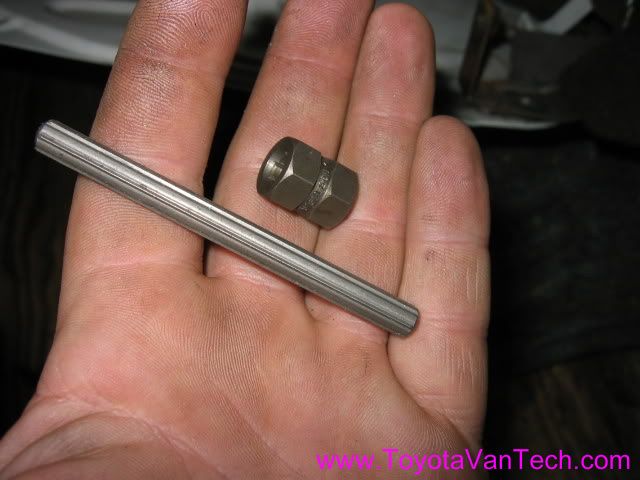
    I have selected the 1/4" extractor.


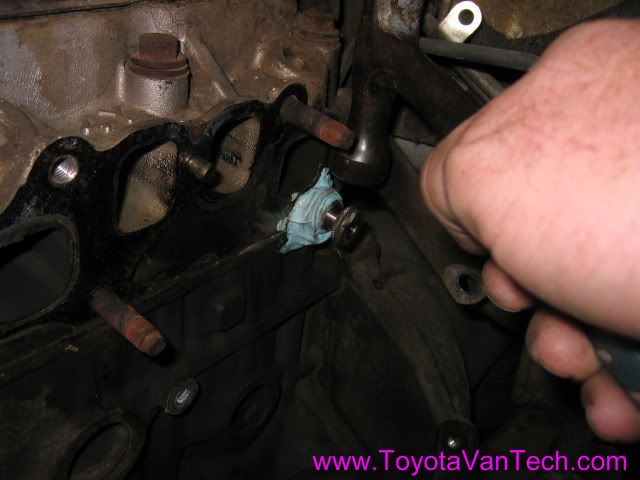
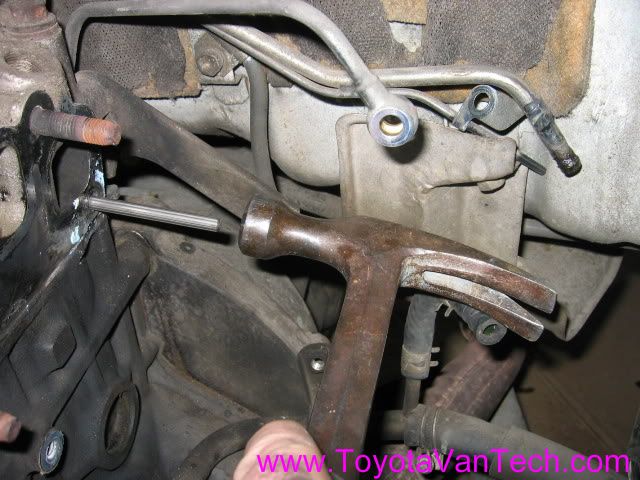
    A 1/4" hole is a tight fit for the extractor, but it can be driven in with a hammer. I drive in all the way to insure good surface contact.


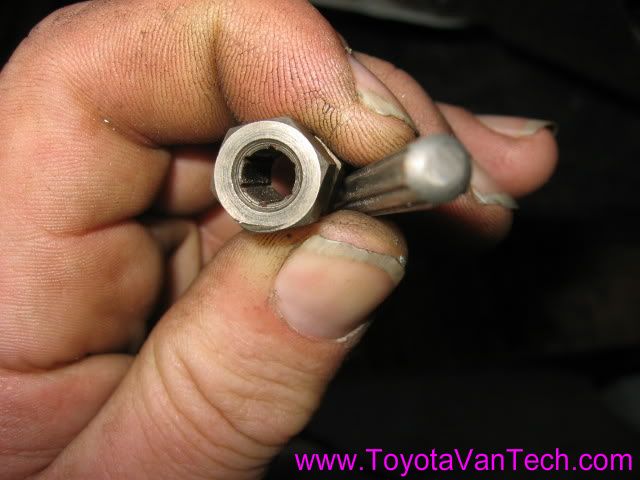
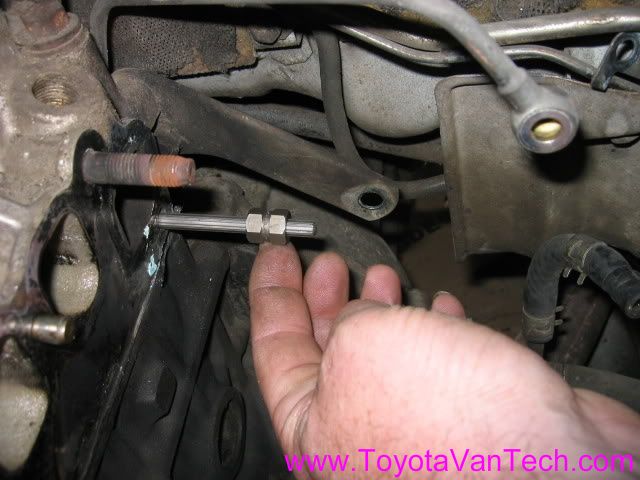
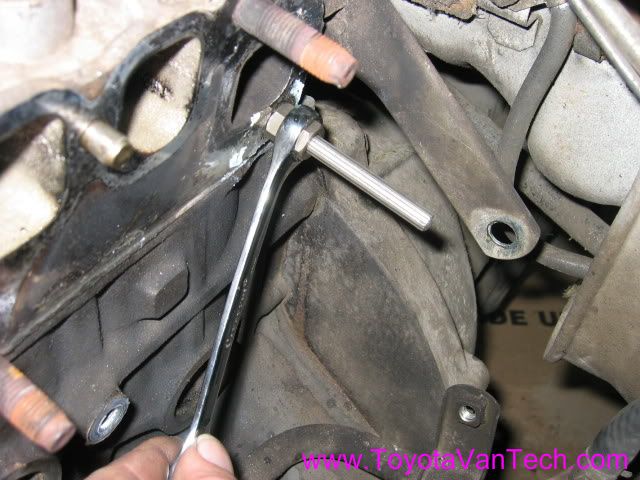
    Now the extractor nut can be slid on.


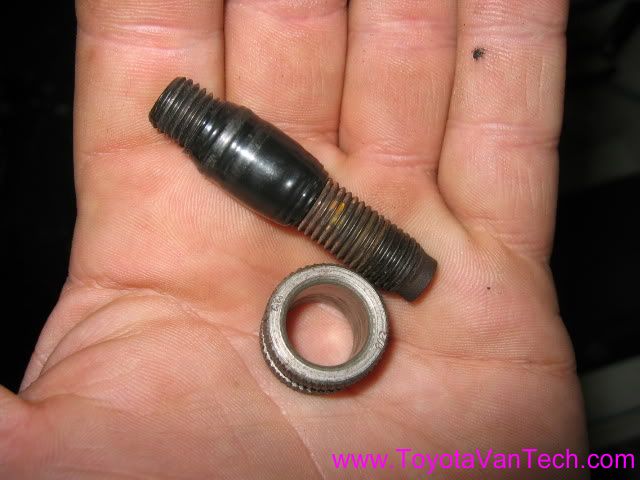
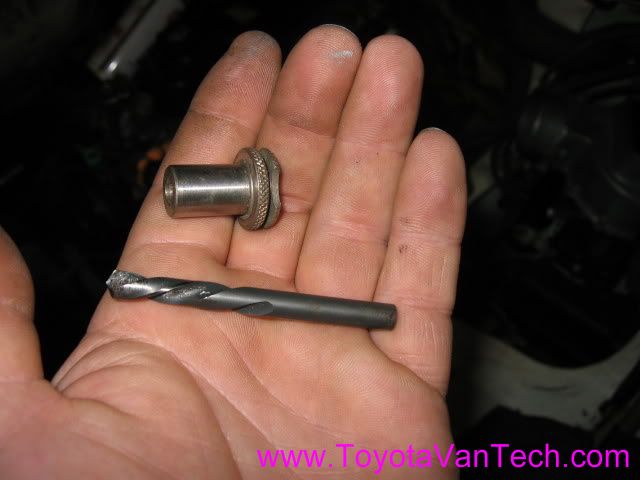
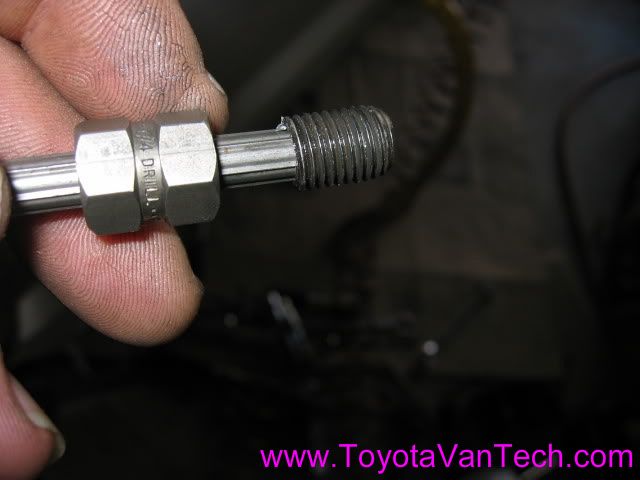
    The next 2 pictures need no explanation .


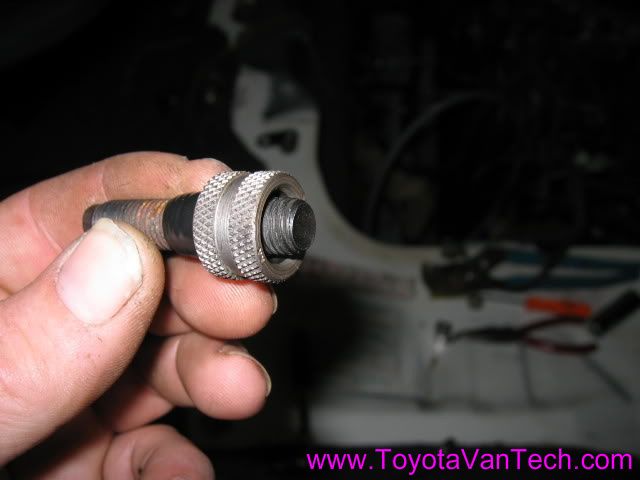
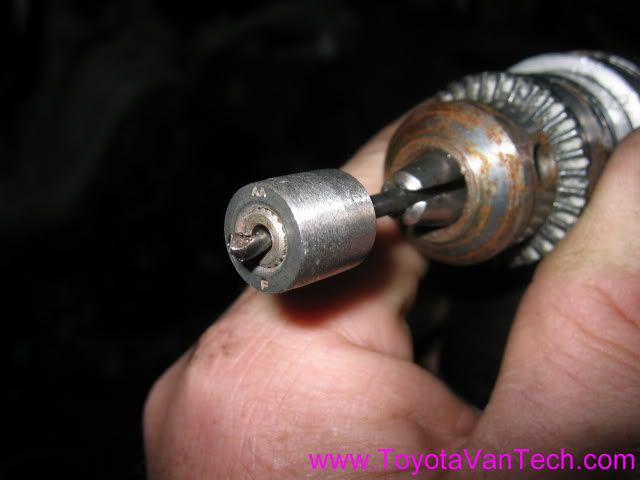
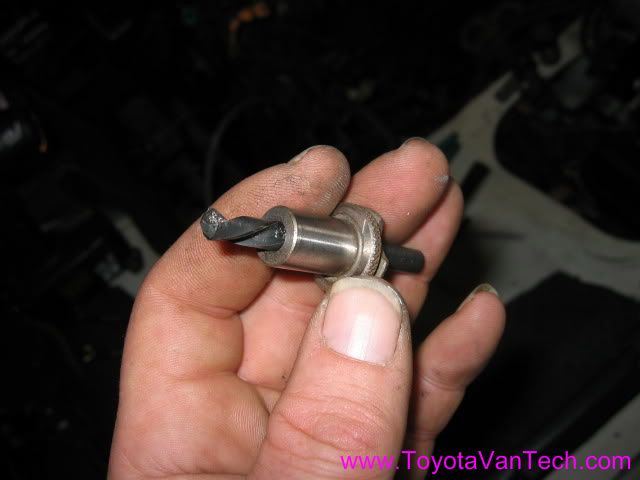
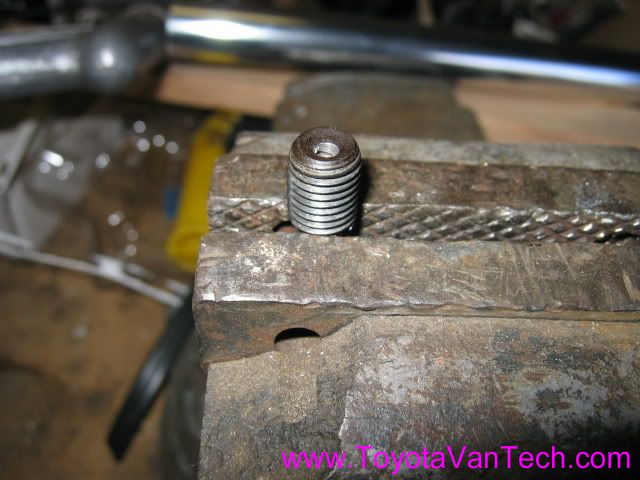
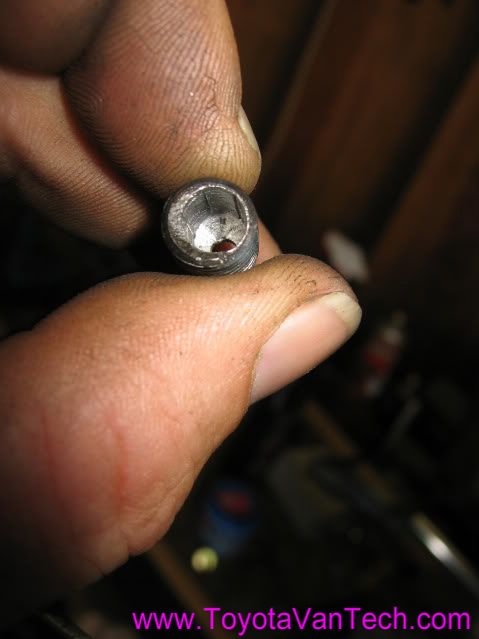
    Remember the step of drilling the pilot hole completely through? Here's why.


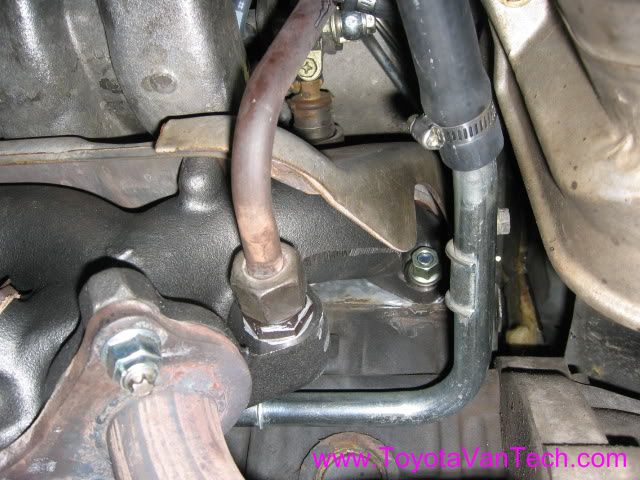
    Now for the best picture of them all . Tim


    Note: Exhaust manifold = Toyota Part #17141-72010 $122.34, Stud = Toyota Part #90116-10063 $.80, Nut = Toyota Part #90179-10051 $1.24, Valve Grind Gasket Kit = Toyota Part #04112-73035 $92.71.

  2. #2
    Van Addict
    My Van(s):
    4x4 Cargo
    Join Date
    Mar 2016
    Location
    Cedar City, UT
    Posts
    351
    Rep Power
    1

    Re: A few tricks for removing broken exhaust studs

    hey tim, two questions.

    -What is a valve grind gasket kit? its mentioned in your parts list but not in the post anywhere. Do i need that to fix a broken stud (its $93)?

    -Is it worth replacing all 8 of the studs while you have the manifold off? or are they not as prone to breaking.

  3. #3
    Administrator timsrv's Avatar
    My Van(s):
    Lots of them
    Join Date
    Jun 2010
    Location
    SW WA ST
    Posts
    6,261
    Rep Power
    10

    Re: A few tricks for removing broken exhaust studs

    I like to have that kit on hand while doing "top end" work as it has pretty much everything you need and you only need to order one part number. It is however a bit of overkill if you're not removing the head. It includes a head gasket, valve cover gasket, valve cover stud seals, intake/exhaust gasket, exhaust donut gaskets, fuel system crush washers, EGR gasket, plenum gasket, valve stem seals, heater system return line gasket, and misc other small gaskets). If you're looking to save money just buy the individual parts you need. It's the head gasket that makes that kit expensive. Tim

    Name:  IMG_4069.jpg
Views: 3660
Size:  92.9 KB

    It's probably not a bad idea to replace all the studs, but it's typically only that back one that breaks. When I rework a head I usually only replace the broken studs. I'll usually replace that back one even if it isn't broken (yet) because that one almost always breaks @ ~150k miles. Tim

  4. #4
    Van Fan
    My Van(s):
    1984 Toyota Van
    Join Date
    Jul 2016
    Location
    USA
    Posts
    53
    Rep Power
    1

    Re: A few tricks for removing broken exhaust studs

    Hey Tim -

    I've read on the forum that you highly advise against aftermarket gaskets, and I wanted to double check that this goes for the exhaust/intake manifold gaskets also.

    I have been purchasing my parts individually, and already have the headgasket and almost all the other gaskets. I also purchased a Felpro exhaust/intake gasket because Toyota had this one discontinued.

    Is it worth the $85 to get the genuine Toyota exhaust/intake gaskets? I would have all the other parts, heagasket included, left over.

    Thanks!
    Hugh

  5. #5
    Administrator timsrv's Avatar
    My Van(s):
    Lots of them
    Join Date
    Jun 2010
    Location
    SW WA ST
    Posts
    6,261
    Rep Power
    10

    Re: A few tricks for removing broken exhaust studs

    Quote Originally Posted by hughdawgmmkay View Post
    Hey Tim -

    I've read on the forum that you highly advise against aftermarket gaskets,
    I'm not too concerned with the other simple gaskets. I will frequently use Felpro and/or generic gaskets for everything except to seal the head to the block. The head gasket is somewhat complex. There are strong steel parts that seal around some critical areas then soft rubbery parts that seal around other areas. Quality of materials and proper amounts/thicknesses are critical. Toyota has spent millions of $$$ over the years in research and product improvements, so I'm most confident in their head gaskets. I have no doubt that others may be "as good" or possibly "even better", but I have no idea what those products may be, nor do I wish to experiment to find out (too much riding on your head gasket). Just my 2¢. Tim

    PS: Because the 4y is not something most parts stores stock parts for anymore, and since I use my van for a daily driver, I make it a point to have enough gaskets on hand to reseal any part of a 4y. Initially I purchased Toyota's "valve grind gasket kit", then use individual gaskets as required when making misc repairs. During small repairs I keep track of what parts I use, then reorder the individual gaskets to "restore" the kit. If things work for you the way they usually work for me, you'll find out you need some weird gasket on a Sunday and be SOL. I just feel better knowing I have a complete kit. Tim

  6. #6
    Van Fan
    My Van(s):
    1984 Toyota Van
    Join Date
    Jul 2016
    Location
    USA
    Posts
    53
    Rep Power
    1

    Re: A few tricks for removing broken exhaust studs

    Awesome, great stuff Tim! Thanks for the clarification, that really helps!

    I definitely have a Toyota head gasket on hand, and plan on throwing on my rebuilt head in the next few weeks. I ended up doing some searching and found a site that still had the Toyota manifold gasket in stock, so I went ahead and grabbed one for $20 shipped. Guess I'll just have a Felpro manifold gasket on the side now in case something goes wrong down the line

    Hugh

  7. #7
    Van Fan
    My Van(s):
    The White Buffalo - '87 4WD 5sp window cargo
    Join Date
    Oct 2018
    Location
    Oakland, CA
    Posts
    42
    Rep Power
    1

    Gaskets other than the HG, and screwing in exhaust bolts

    ​Hey Tim - regarding gaskets other than the head gasket -- specifically, the ones for the throttle body and the EGR -- is it acceptable to use gasket paper? I am in the process of replacing my head gasket and everything else I can think of, and the toyota kit (04112-73035) does not seem to include these. Should I instead be looking for aftermarket gaskets specific to these applications, or is paper ok? I ordered FelPro paper set 3060.

    Relatedly, I also picked up a tube of Toyota FIPG. I know you have said elsewhere NOT to use this on the head gasket, but where is it particularly important that I DO use some?

    One more question: when installing new exhaust bolts, is there a torque spec or some guideline as to how you know they're all the way in?

    Thanks! This site is an amazing resource, without which I could never have undertaken any of this.

  8. #8
    Forum Newbie
    My Van(s):
    1986 Toyota Cargo Panel 140K
    Join Date
    Sep 2016
    Location
    Central Coast CA
    Posts
    11
    Rep Power
    1

    Re: A few tricks for removing broken exhaust studs

    Tim, Great info! Although i hope i never have to fix a broken stud. I have to wonder how it is that your steel coolant line in the final picture looks like new? Is it re-plated? They are usually in less than desirable shape. I had to replace a rusted out one years ago and was lucky enough to find a decent one at Pick N Pull. Do you have any good sources should i need another in the future? Many thanks for all your help. -john

  9. #9
    Administrator timsrv's Avatar
    My Van(s):
    Lots of them
    Join Date
    Jun 2010
    Location
    SW WA ST
    Posts
    6,261
    Rep Power
    10

    Re: Gaskets other than the HG, and screwing in exhaust bolts

    Quote Originally Posted by VanDown View Post
    ​Hey Tim - regarding gaskets other than the head gasket -- specifically, the ones for the throttle body and the EGR -- is it acceptable to use gasket paper? I am in the process of replacing my head gasket and everything else I can think of, and the toyota kit (04112-73035) does not seem to include these. Should I instead be looking for aftermarket gaskets specific to these applications, or is paper ok? I ordered FelPro paper set 3060.

    Relatedly, I also picked up a tube of Toyota FIPG. I know you have said elsewhere NOT to use this on the head gasket, but where is it particularly important that I DO use some?

    One more question: when installing new exhaust bolts, is there a torque spec or some guideline as to how you know they're all the way in?

    Thanks! This site is an amazing resource, without which I could never have undertaken any of this.

    Sorry about taking so long to reply. With the cold weather we've had a bunch of late night emergency jobs so not much time left over for the forum. You can definitely make your own TB gasket, but why? Just get one from Toyota or one of the on-line sites. The part number is listed at the bottom of THIS POST. If you do end up making one, just be sure to use "gasket making material" because regular paper or cardboard may not hold up to the punishment. Most auto parts stores will sell this material in different sizes and thicknesses.

    FIPG has many uses. You can view MY BLOGS or THIS THREAD to see where it's used and how much.

    Regarding the studs, there's a shoulder that stops them from going in too deep. Just jam them in there until they bottom out. I usually put a little extra crank on them to make them snug. Doing that helps keep them in the head so they don't come out with the nuts. Using double nuts is a good way to drive them home without damage. Tim

  10. #10
    Administrator timsrv's Avatar
    My Van(s):
    Lots of them
    Join Date
    Jun 2010
    Location
    SW WA ST
    Posts
    6,261
    Rep Power
    10

    Re: A few tricks for removing broken exhaust studs

    Quote Originally Posted by CargoPanel111 View Post
    Tim, Great info! Although i hope i never have to fix a broken stud. I have to wonder how it is that your steel coolant line in the final picture looks like new? Is it re-plated? They are usually in less than desirable shape. I had to replace a rusted out one years ago and was lucky enough to find a decent one at Pick N Pull. Do you have any good sources should i need another in the future? Many thanks for all your help. -john
    Hi John,

    That steel line is the original one from my 89 cargo van. It was a CA vehicle so it didn't experience salted roads. The PO also did a good job keeping clean antifreeze in the engine so it was good on the inside too. It was stained and dirty when I got it, but I tend to get a little OCD with cleaning and I worked it over with Scotch Bright and Solvent not long before that pic was taken . BTW, whenever I see things like that at the pick-n-pull I take them because I know they're next to impossible to find otherwise. Tim

  11. #11
    Van Fan
    My Van(s):
    The White Buffalo - '87 4WD 5sp window cargo
    Join Date
    Oct 2018
    Location
    Oakland, CA
    Posts
    42
    Rep Power
    1

    Re: A few tricks for removing broken exhaust studs

    Tim, thanks for all the info!

    Quote Originally Posted by timsrv View Post
    You can definitely make your own TB gasket, but why? Just get one from Toyota or one of the on-line sites. The part number is listed at the bottom of THIS POST. If you do end up making one, just be sure to use "gasket making material" because regular paper or cardboard may not hold up to the punishment. Most auto parts stores will sell this material in different sizes and thicknesses.
    I omitted a critical detail: the TB gasket (Toyota part #22271-73011), is now NLA. I am going to proceed with the felpro gasket paper, unless anyone can point me towards an aftermarket one or a discount seller that still has some in stock.

  12. #12
    Administrator timsrv's Avatar
    My Van(s):
    Lots of them
    Join Date
    Jun 2010
    Location
    SW WA ST
    Posts
    6,261
    Rep Power
    10

  13. #13
    Forum Newbie
    My Van(s):
    1986 Toyota Cargo Panel 140K
    Join Date
    Sep 2016
    Location
    Central Coast CA
    Posts
    11
    Rep Power
    1

    Re: A few tricks for removing broken exhaust studs

    Hi Tim, Your finished job looks great. I hope to find an opportunity to pick up another coolant line as a spare, but the vans don't show up in wrecking yards as often as the good old days. Regarding the TPS replacement and adjustment...i thought that i saw that there was a video on TVT but now i can't seem to find it again. Some time soon i need to do this. Perhaps you can steer me the right direction. Many thanks! -john

  14. #14
    Administrator timsrv's Avatar
    My Van(s):
    Lots of them
    Join Date
    Jun 2010
    Location
    SW WA ST
    Posts
    6,261
    Rep Power
    10

    Re: A few tricks for removing broken exhaust studs

    Quote Originally Posted by CargoPanel111 View Post
    Regarding the TPS replacement and adjustment...i thought that i saw that there was a video on TVT but now i can't seem to find it again. Some time soon i need to do this. Perhaps you can steer me the right direction. Many thanks! -john

    Click on the link in post #9 & 11 (this thread). The video is at the bottom of my 1st post in the throttle body thread.

  15. 04-26-2019, 07:43 PM

    Reason
    doesn't belong here

  16. 04-26-2019, 10:46 PM

    Reason
    doesn't belong here

Tags for this Thread

Posting Permissions

  • You may not post new threads
  • You may not post replies
  • You may not post attachments
  • You may not edit your posts
  •