-
Fuel gauge not working?
I've seen this problem on 4 of my vans so far and each time it ended up being the same thing (fuel level sending unit inside the fuel tank). The 1st couple times I fought with it and pulled the entire tank out of the van. The last couple times I left the tank partially installed and was able to complete the job much faster! Doing it this way will save about 1/2 the time and the difficulty level is reduced. Here are some pictures I took while doing the job. Note, this is a 4wd van, but the procedure is the same on a 2wd.
1st step is to use up or drain most of your gas. In this case I drove the van until the low fuel light came on, then did the job (if you drain gas, familiarize yourself with safe gasoline handling practices before attempting). Jacking the vehicle is required, so safely lift and secure the vehicle for access. In this case, I left the front wheels on the ground, put my jack under the rear differential and jacked it up until the rear wheels were about 1 foot off the ground. I secure the vehicle by placing jack stands under each side of the rear axle. Once you have access underneath, remove the (5) 12mm bolts that secure the plastic tank protector, drop it down and get it out of the way. Note: picture shows front 3 bolts (rear bolts not shown).
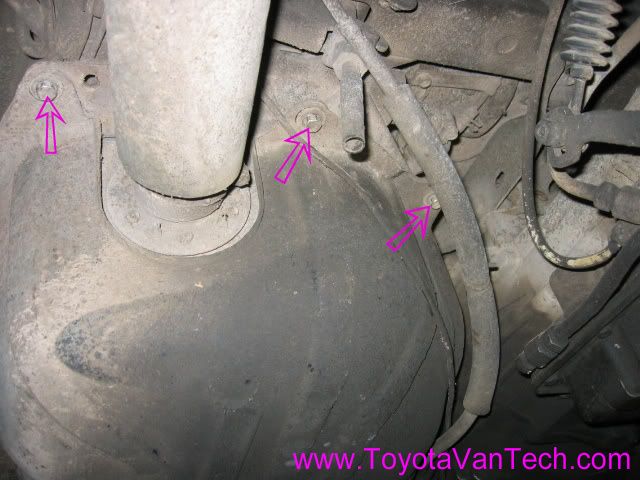
Next loosen the (2) 12mm front tank mounting bolts but don't remove (make them very loose).
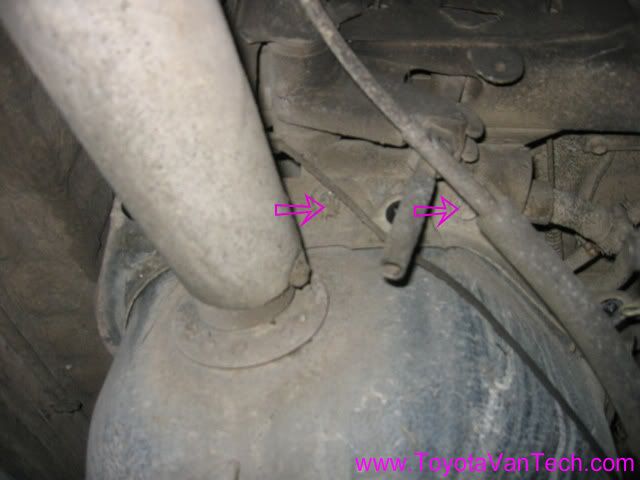
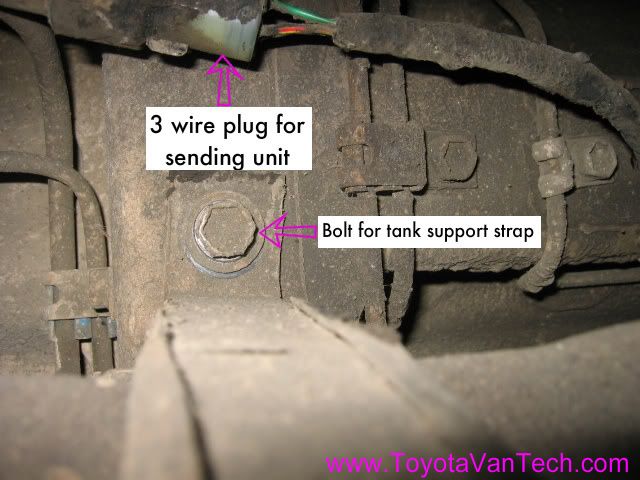
Next pull the sending unit electrical plug from it's spring clip mount and separate it from the wire harness. Pull the 14mm bolt that secures the tank support strap, and pull the strap down and out of the way.
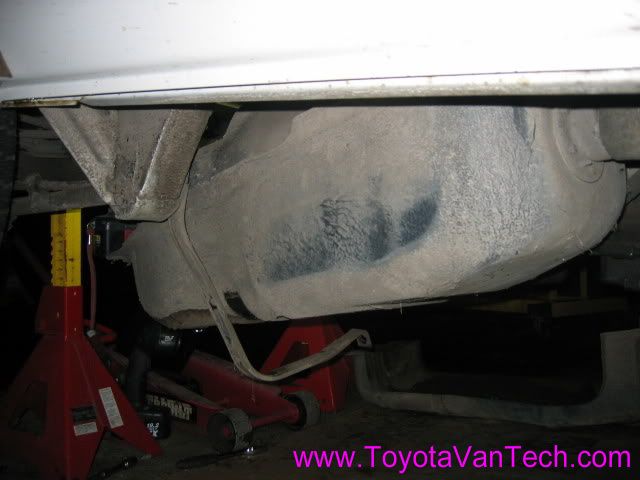
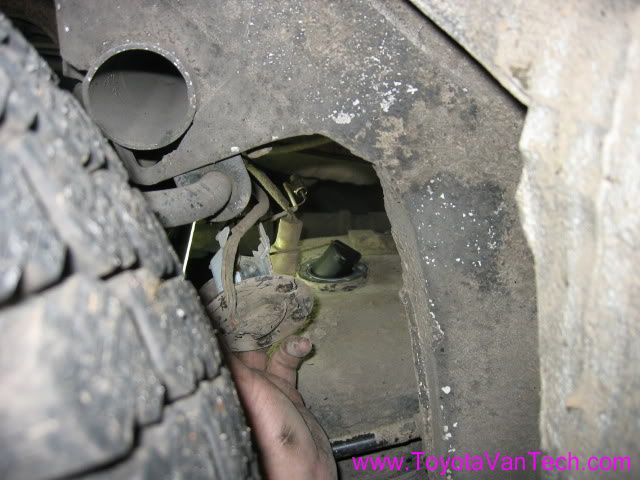
Now completely remove the rear tank mounting bolt and allow the tank to drop. It will drop about 8" before the fuel hoses pull tight. It's okay to let it hang on on these hoses as long as tank is mostly empty.

Here's the tank hanging by the hoses.
This is the cool part, as a pure coincidence, the area between the RR tire and the wheel well lines up perfectly with the sending unit on the hanging tank. This is the perfect access tunnel for reaching in and removing the sender! Note: Before removal, it's a very good idea to blow the dust and debris off the top of the tank with compressed air. Focus on in the immediate area of the sending unit flange. A 90 deg scribe followed by more air works well to loosen and disperse the dirt and crud from inside the Phillip's head screw cavities before attempting to remove them. Be sure to wear eye protection and avoid breathing the dust while using compressed air.
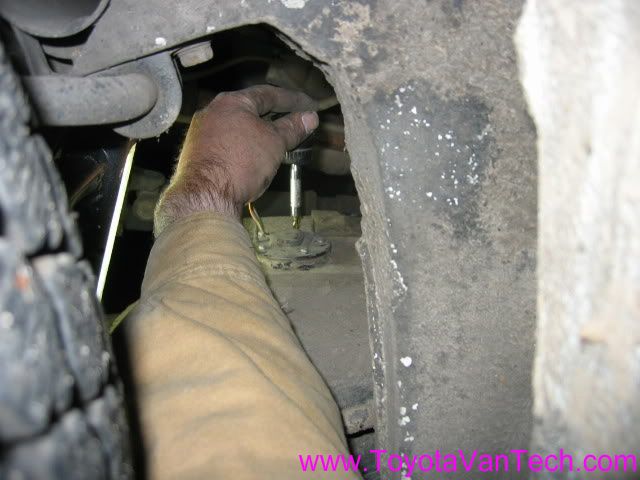
There is the perfect amount of room to pull the sender out and replace. The sender has a long arm with a swinging float. There are several bends in the arm, so it is necessary to rotate and change angles as you lift.
Once out, you can use an ohm meter to check the range of resistance. This is one of those rare instances that an analog ohm meter will work the best. Once hooked up you can move the float up and down and you can watch the needle on you meter make linear movements with the float position. If there are dead spots (and there likely will be), then you can either replace the entire unit or try to repair. Last I checked Toyota still had these available. Keep in mind that 4wd and 2wd vans use different senders. I'm not exactly sure what the difference is, but they call for different part numbers in the EPC. Toyota Part # 83320-80034 is used for 4wd & Toyota part # 83320-29857 is used for the 2wd. Prices vary from place to place, but you can expect it to cost between $100 - $150.
IMO, although possible, repair is not probably not your best option. I have done this successfully in the past, but I didn't feel it would be a lasting fix. I guess it depends on the condition of the rheostat and the contact spot on the arm inside. If you choose to go this route, disassemble the little metal box by bending the tabs. Carefully inspect the rheostat and the arm. If the arm and/or the rheostat aren't worn through, then you might get lucky. It's important that these parts be clean and that there is enough tension on the sliding arm to make good electrical contact with the rheostat coil. I found using a pencil eraser is great for cleaning these contacts.
The rheostat arm can be re-arched by forcing it past it's normal travel and making it slip on it's shaft. Once it's extended beyond it's normal travel and is away from the rheostat you can grab it near the base with a pair of needle nose pliers. Once the base of the arm is held steady, you can carefully bend it (be careful not to go too far). Once you are satisfied with the shape of the arm, rotate it back to it's normal range of travel and retest using the ohm meter. Reassemble in the reverse order of disassembly and you should now have a working fuel gauge. Tim
Tags for this Thread
 Posting Permissions
- You may not post new threads
- You may not post replies
- You may not post attachments
- You may not edit your posts
-
Forum Rules


 Reply With Quote